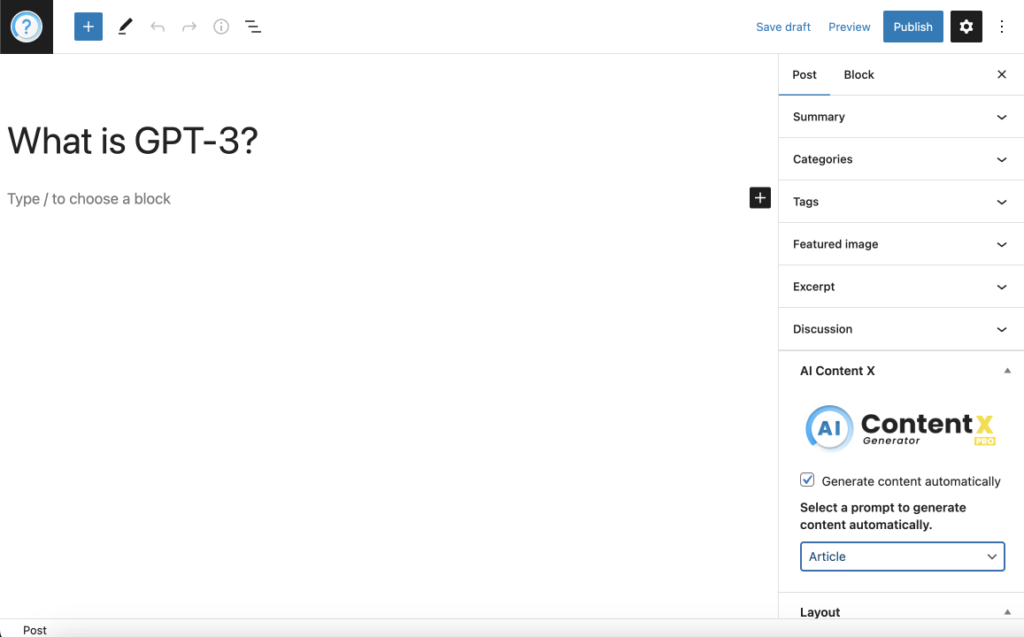
- Create a new post in your WordPress dashboard and enter a title.
- Scroll down to the AI Content X section and check the “Generate” box.
- Select Prompt to use
- Choose the status of the post after it has been updated in the “New Status Post” field.
- When you are finished configuring your post, save it in the desired status.
- The plugin will automatically generate the content in the background using the prompt and other settings you have specified. You can check the progress in the “Queue & Logs” section of the plugin.

It is important to note that you will need to have a valid OpenAI API Key and have configured the plugin settings in the WordPress dashboard before you can use the AI Content X plugin in your posts. You can find more information about configuring the plugin in the plugin documentation, also note that you will need to have the “AI Content X Generate” checkbox checked and the post status set to a value that is configured in the plugin settings in order for the plugin to generate content for your post.
It is important to remember that the title of your post will be used in the prompt template when generating content using the AI Content X plugin. The prompt template is a set of instructions that tells the plugin how to generate content for your post.
To use the title of your post in the prompt template, you can use the %post_title% variable. This variable will be replaced with the actual title of your post when the plugin generates content for your post.
For example, if your post title is “10 Tips for Training Your Dog”, the %post_title% variable will be replaced with “10 Tips for Training Your Dog” when the plugin generates content for your post.


